
Die-Cut Label Corners: Radius and Edge Lift
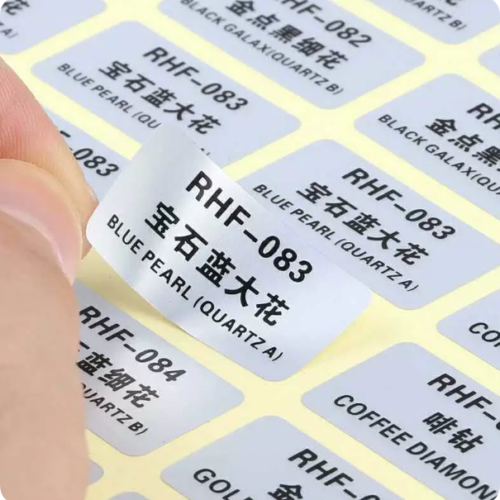
Sharp square corners catch on a sleeve or a shipping carton and start an edge lift that spreads across the label. A rounded radius holds better, particularly on a soft-touch or textured carton where the adhesive has less to grip. Set the radius with the artwork in mind, and rub a sample label along a carton edge before approving the die.
Demander un devis
Indiquez la quantité souhaitée et ajoutez-la à votre liste de devis pour obtenir un devis.
Description
A label with sharp square corners tends to fail at one of those corners. A sleeve, a shipping carton or a finger catches the point, the facestock lifts a millimetre, and the lift spreads along the edge over the next few days. A rounded corner radius is a small change on the die drawing that removes the starting point.
Why a Corner Starts the Lift
Adhesive holds a label across its area, and the outside edge has the least support. A square corner concentrates any sideways rub into one point, while a radius spreads it along a curve. The effect is stronger on a thin film facestock, which has a little spring of its own and wants to return to flat once a corner is raised.
The carton surface matters as much as the label. A soft-touch film, a textured uncoated board and a recycled kraft sheet give the adhesive less to grip than a smooth coated surface. Where the finish is unusual, a slightly larger radius and a more tolerant adhesive keep the edge down.
Choosing a Radius That Fits the Artwork
A radius of a few millimetres is enough on a small label, and a larger one reads as a deliberate shape on a big panel. Set it from the artwork: a circular seal wants a true circle, a rectangular shade label wants a modest corner radius, and a border that runs close to the edge needs enough room that the radius does not cut into it. Keep the border and the die on one file so a late artwork change does not leave the two out of step.
Where the label crosses a carton crease, no radius will hold the edge down. Move the label to a flat panel or split it into two pieces, one on each face.
Die Quality and Cutting Waste
A worn die leaves a ragged edge that lifts as readily as a square corner. A clean cut through the facestock without scoring the liner keeps the label flat on release and lets it peel cleanly. Where the run is long, plan a die check partway through so a dull tool does not quietly change the edge quality. The autocollants et étiquettes range covers paper and film constructions, and the boîtes de cosmétiques range includes soft-touch surfaces that need a little extra edge tolerance.
Testing Against Real Handling
Rub an applied label along a carton edge, then pack a few cartons into a shipping outer and leave them for a day. Look at the corners under raking light: a lift that starts as a bright line is easy to miss under flat overhead lighting. Check a label from the end of the run as well as one from the start.
Checks Before the Die Is Cut
- Set the corner radius from the artwork border, with both on one file.
- Confirm the die cuts the facestock without scoring the release liner.
- Keep the label off carton creases and folds.
- Rub an applied label along a carton edge and inspect it a day later.
- Compare edge quality on labels from the start and the end of a long run.
Label shape also affects how a label is picked up. A long narrow label bends in the hand and can be laid down with a small twist, which leaves one corner standing proud. Where the artwork allows, a slightly squarer proportion goes on straighter and gives the adhesive less edge to defend at the corners.
Send the label size, the facestock and the carton finish when you ask for a quote. With the radius, the die condition and the surface settled together, the label stays flat through packing and arrives without a lifted corner.